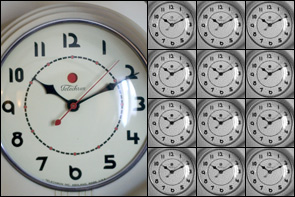
black & white conversions with ring-around
If you want to convert a color photograph to black & white in Photoshop, there are a bunch of ways you can do it. For the longest time, I used the Hue/Saturation dialog—taking the saturation down to -100. The shortcut for this is: Image

It's hard to tell from these tiny images, but each one is slightly different. (Take a look at the dot in the center of the clock.) Each image is a blend of color channels in different percentages. One is 100% red, another is 75% red and 25% green, and so on. Using a Photoshop action, this whole process is automated. So I create the 12 images with a click, and then I can go through each one to see which had the best conversion. From there, I go back to the original image and mix it to blue 75%, red 25% (or whatever) in the channel mixer with the output set to Gray. (If the final output is print, you could print all of the samples to see which looked best in its final form.) It takes a bit longer than hitting Desaturate, but I like the extra control over the conversion.
-> Adjustments -> Desaturate. This works well, but I found a new technique in the oct/nov issue of Photoshop User that I'm hooked on called ring-around. I won't go into the gorey how-to details, but it uses "Channel Mixer" adjustment layers to produce twelve separate images with different settings from the source color channels.

It's hard to tell from these tiny images, but each one is slightly different. (Take a look at the dot in the center of the clock.) Each image is a blend of color channels in different percentages. One is 100% red, another is 75% red and 25% green, and so on. Using a Photoshop action, this whole process is automated. So I create the 12 images with a click, and then I can go through each one to see which had the best conversion. From there, I go back to the original image and mix it to blue 75%, red 25% (or whatever) in the channel mixer with the output set to Gray. (If the final output is print, you could print all of the samples to see which looked best in its final form.) It takes a bit longer than hitting Desaturate, but I like the extra control over the conversion.
However, you don't need to make the process as complicated as above- Just go to channel mixer, check the 'monochrome' box in the bottom right corner, and play around with percentages of each channel, as long as they add up to 100. Make sure preview is checked so you can see the results, and decide which you like. For portraits, go heavy on the ready channel (another trick w/portraits- do sharpening only on the red channel- that will sharpen edges, eyes, mouth, but leave the skin tones nice and soft.)